Last week I was in San Francisco at the Build conference and in the “Introducing ASP.NET 5” Session there was a short demo, which was very interesting: Scott&Scott basically created an asp.net project and opened it in Visual Studio Code and compiled and started the whole thing on a Mac. This means that you are able to develop asp.net apps under Mac! As a Mac owner I wanted to try this out, here is how it works:
1) DNVM & DNX
The first thing you need to install is the .NET Version Manager (DNVM). DNVM manages the .NET Execution Environment (DNX). You can do this with
brew install
dnvm brew update
At this point I had the problem that the dnvm command was not available (I only had dnvm.sh, which just didn’t do anything). If you have the dnvm command, then you are lucky, otherwise run this:
source dnvm.sh
The next step is to install DNX. "The .NET Execution Environment (DNX) contains the code required to bootstrap and run an application. This includes things like the compilation system, SDK tools, and the native CLR hosts.” (Source: https://github.com/aspnet/DNX). To install it let’s run:
dnvm upgrade
(For the first time this failed for me, because there was no bower installed on my machine. If you have this problem just run: npm install -g bower)
To make sure everything works try the following 3 commands (we will need them later)
dnvm
dnu
dnx
By installing these tools you are now able to start a .NET application on your mac.
Now let’s move on to the things which you would do in Visual Studio (like File->New Project, Editing Code, etc.)
2) Yeoman
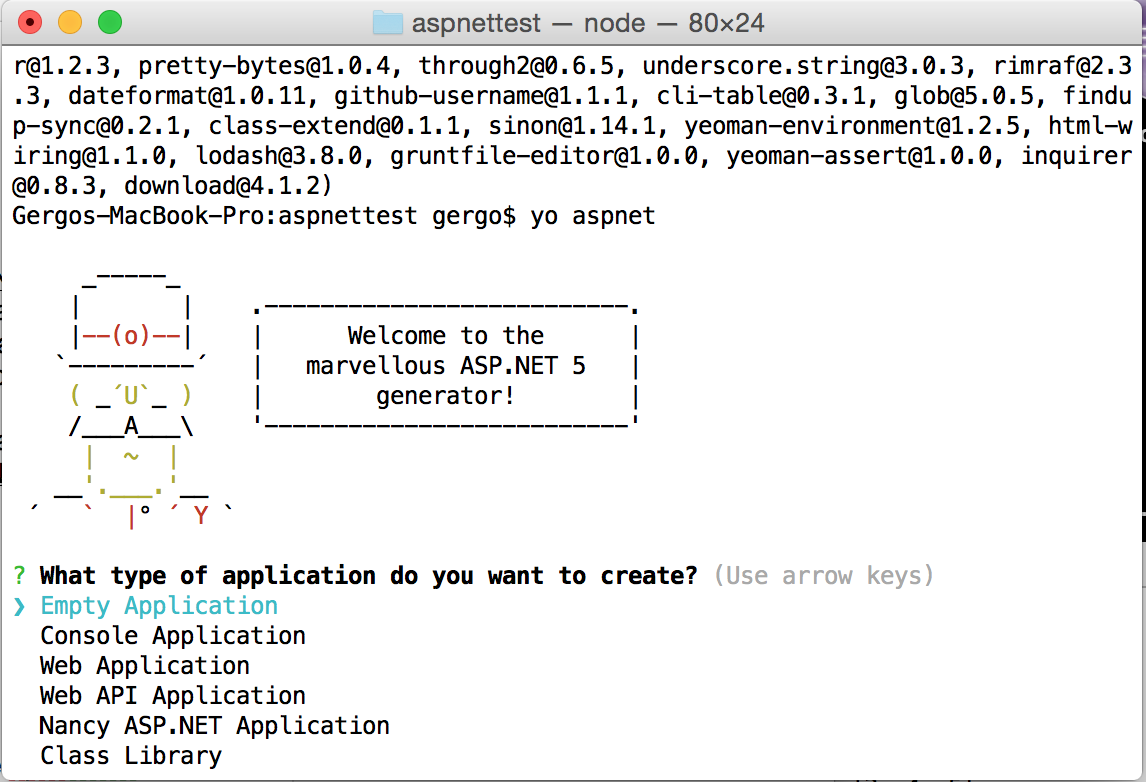
First you need Yeoman, which is basically a generator ecosystem. You can download templates for different projects (like Angular, React, etc. aaand last but not least also for ASP.NET) and let the project structure generated by Yeoman.
The template I installed was the template called "aspnet" from OmniSharp. So first let’s run
npm install -g yo
With the yo command you can directly install the asp.net generator.

This tries to run the npm install -g generator-aspnet command, which failed for me, because I didn’t use sudo for yo when I started it (why would I?!), so I just started the command with sudo manually sudo npm install -g generator-aspnet This worked perfect.
After this you can just type yo aspnet. As you see this is basically the equivalent of File->New Project from Visual Studio…
As the message at the end of the yo command says now we need
dnu restore
dnu restore basically restores the NuGet packages (and some other thing I currently don’t know exactly…)
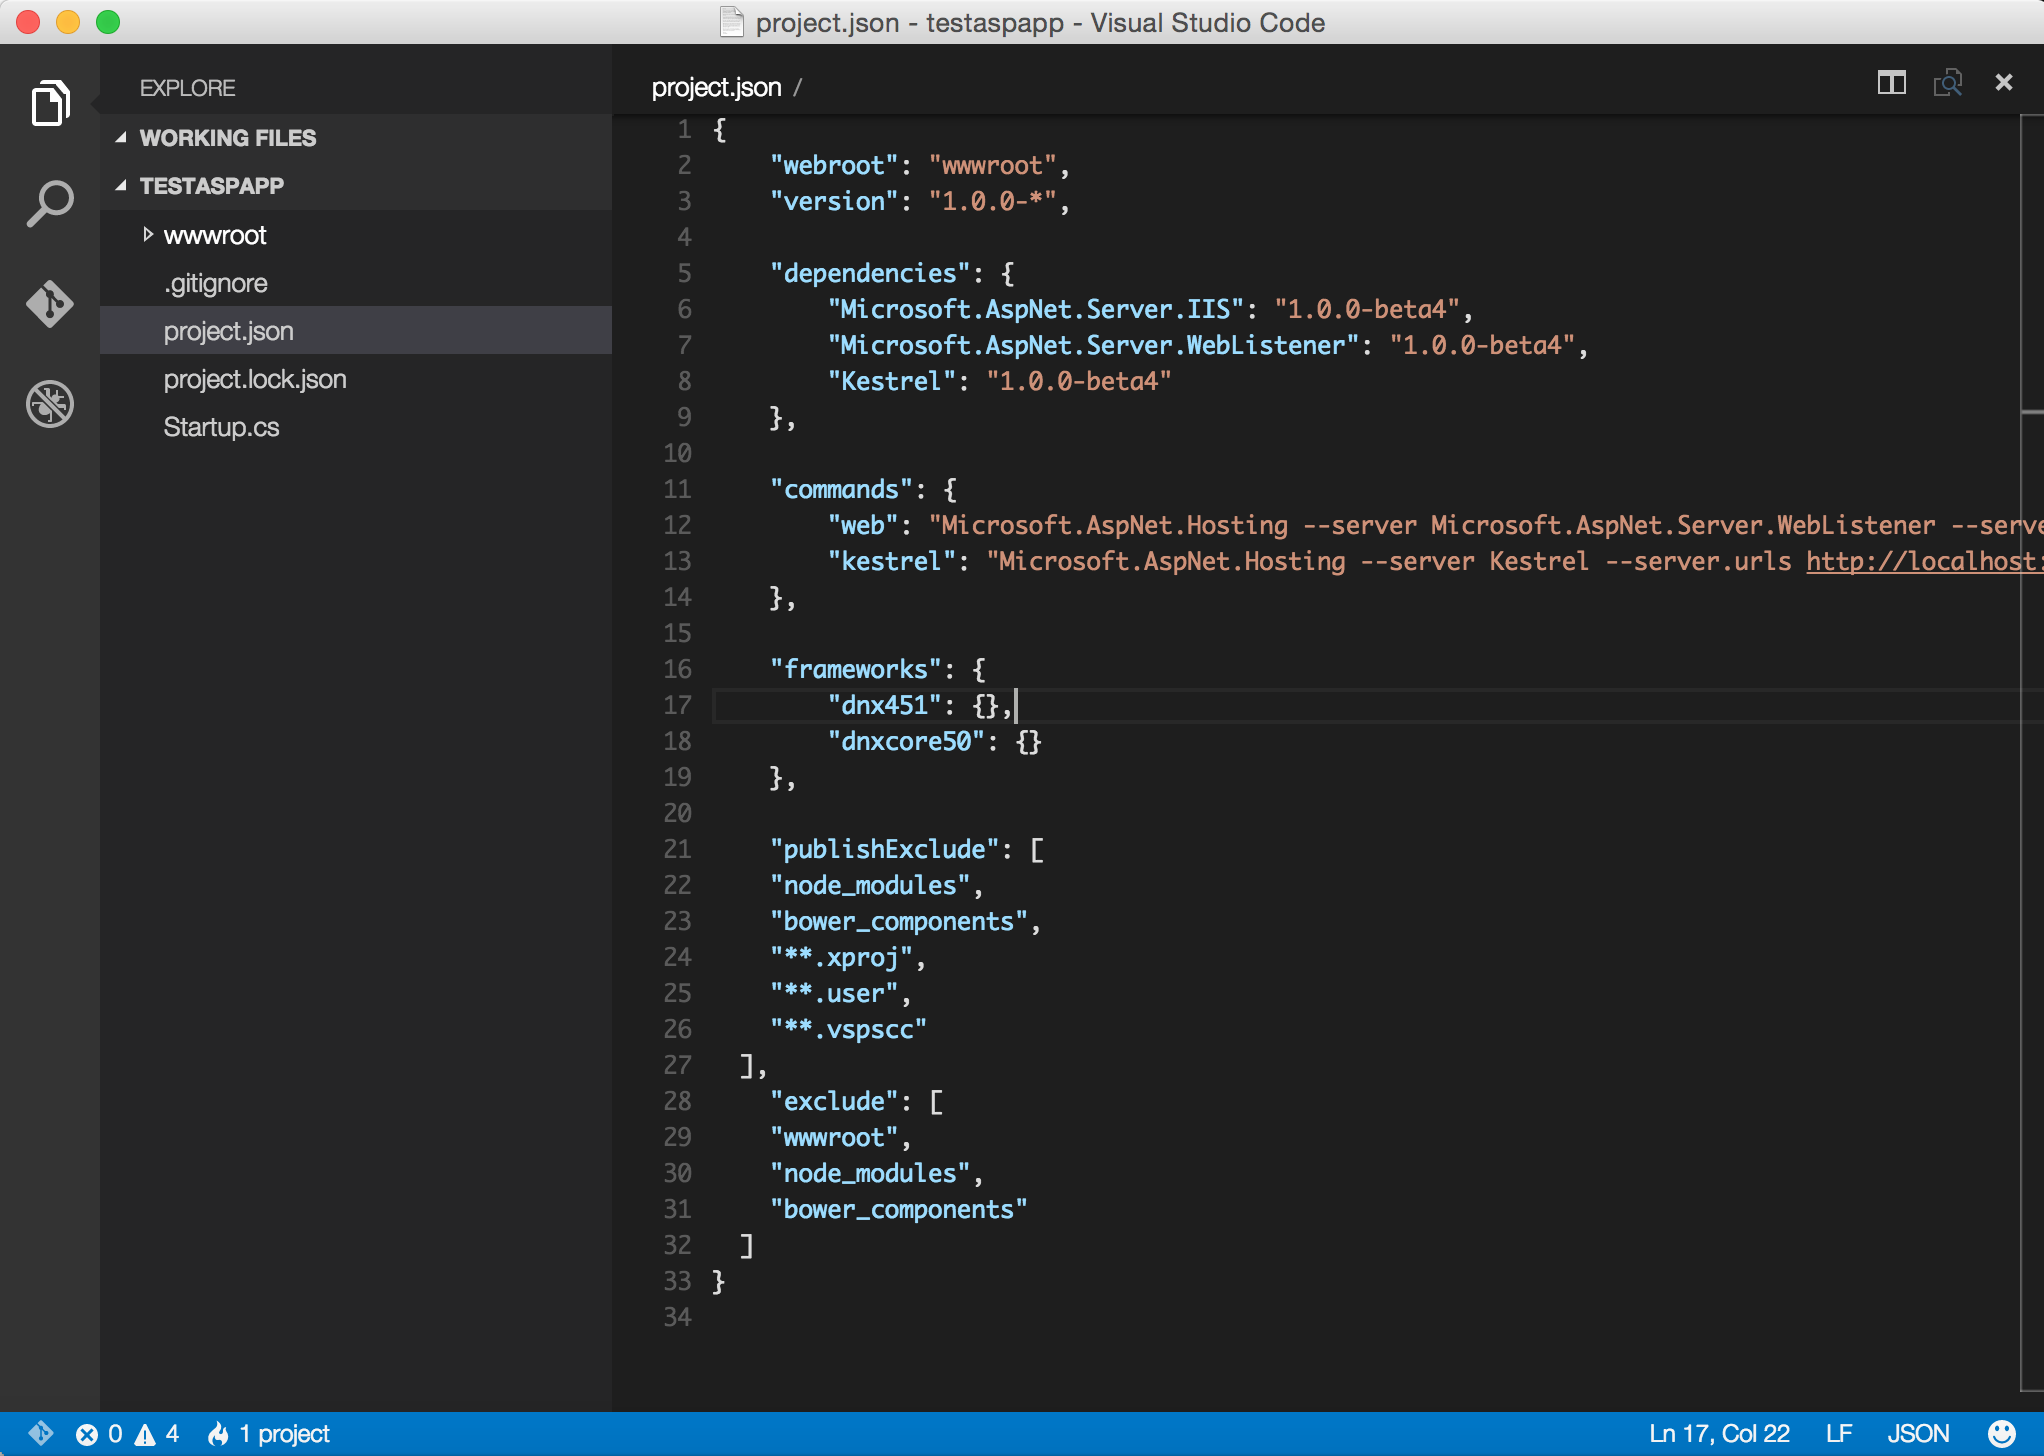
3) Visual Studio Code
On the Build conference Microsoft announced a cool editor called Visual Studio Code. Download it and go into the generated project (File -> Open). As you see it recognises the project.json file. So here you can edit your code (as you would in Visual Studio)
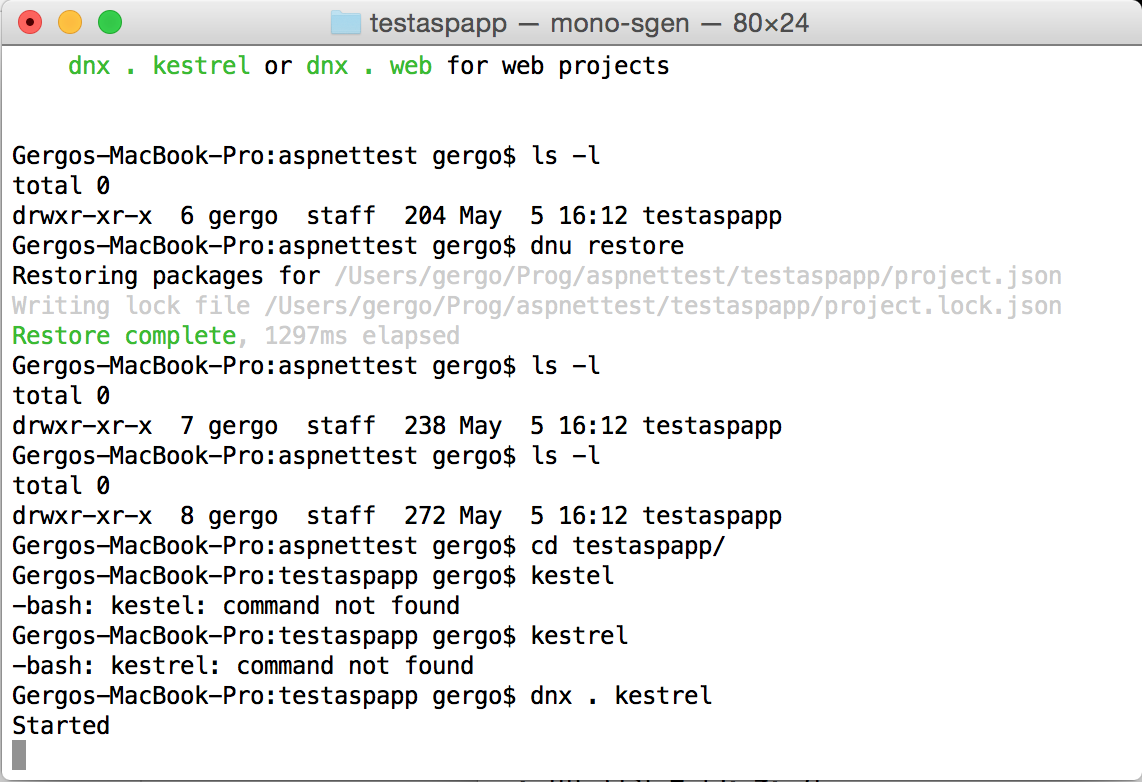
4) Let’s start it in dnx!
At this point we already have an application which we can start by typing
dnx . kestrel
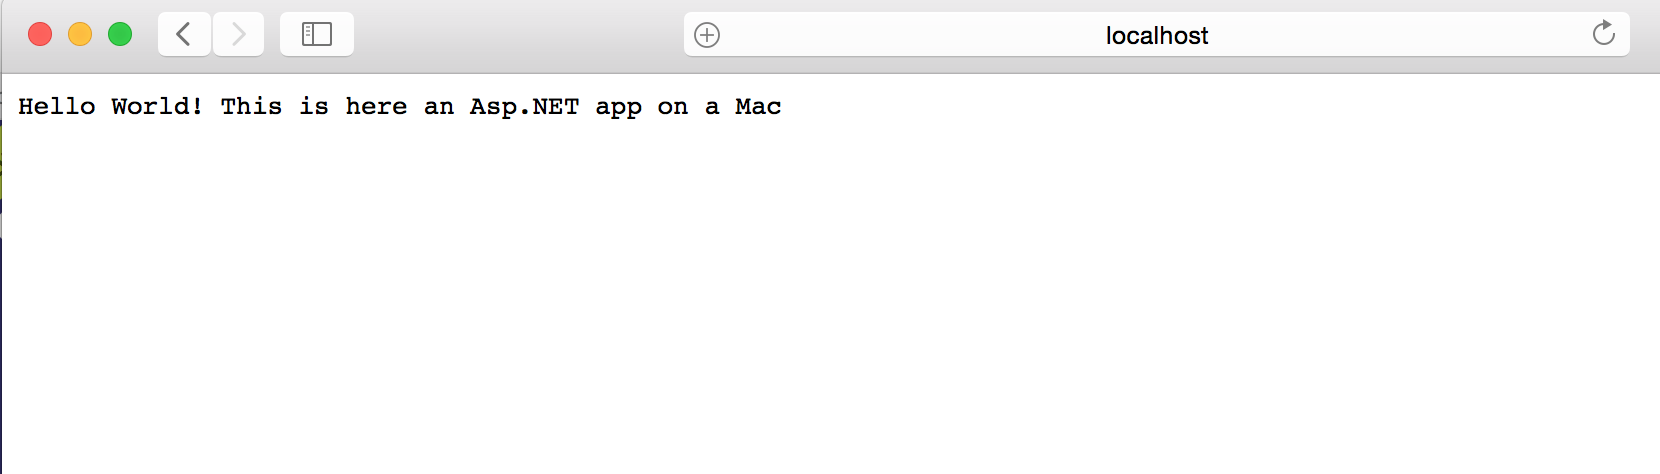
Aand it says “Started”.
By opening up a web browser we can make sure that it’s really started.
One thing which is different on windows is that here on Mac we used kestrel with the dnx command. This is because on Mac there is no weblistener. What you use here is kestrel. You can see this in the project.son
"commands":
{
 "web": "Microsoft.AspNet.Hosting --server Microsoft.AspNet.Server.WebListener
    --server.urls http://localhost:5000",
 "kestrel": "Microsoft.AspNet.Hosting --server Kestrel
    --server.urls http://localhost:5001"
},
So that’s it. This is a basic ASP.NET app and from here everyone can build a real application running on top of .NET on a Mac.